https://blog.tensorflow.org/2018/04/predicting-price-of-wine-with-keras-api-tensorflow.html
https://blogger.googleusercontent.com/img/b/R29vZ2xl/AVvXsEhx-ki-cbDj_QawH_gBw4pLwbXkr8VD-JJ32qmikBFgfJjRVKP2jrKXSWO_YAI6VxNykrN9I7cTxllQ9tQO1lwbXBeuda-TqNuLb7EF9a5BYF0JYnDBhNl1wp6mKEXSZvUX_AkJbaYn5Ww/s1600/1_SsQzL6iuXbFvq8VBBKVKEA.png
Posted by Sara Robinson
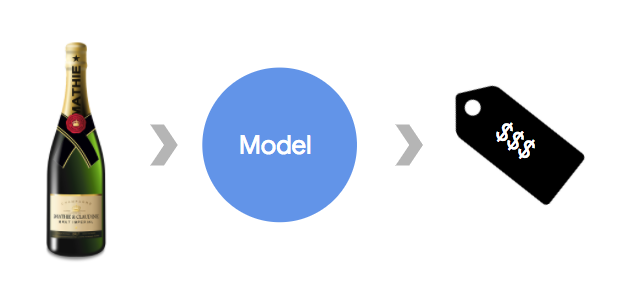
Can you put a dollar value on “elegant, fine tannins,” “ripe aromas of cassis,” or “dense and toasty”? It turns out a machine learning model can. In this post I’ll explain how I built a wide and deep network using Keras (
tf.keras) to predict the price of wine from its description. For those of you new to Keras, it’s the higher level TensorFlow API for building ML models. And if you’d like to skip right to the code, it’s available
on GitHub here. You can also
run the model directly in the browser with zero setup using Colab here.
 Shout-out to Francois, Josh, and Yufeng for their help and input on this post.
The model: wide & deep with Keras
I’ve been building a lot of Keras models recently (here are
some examples) using the Sequential model API, but I wanted to try out the Functional API. The Sequential API is the best way to get started with Keras — it lets you easily define models as a stack of layers. The Functional API allows for more flexibility, and is best suited for models with multiple inputs or combined models. A good use case for the Functional API is implementing a wide and deep network in Keras. There’s a lot of great resources on wide and deep so I won’t focus on the specifics, but if you’re interested in learning more I recommend
this post.
And before you jump to solve your ML problem with a wide and deep network, it’s best to make sure it’s well suited for what you’re trying to predict. If you’ve got a prediction task where there’s a relatively direct relationship between inputs and outputs, a wide model will probably suffice. Wide models are models with sparse feature vectors, or vectors with mostly zero values. Multi-layer deep networks, on the other hand, have been known to do well on tasks like image or speech recognition, where there may be unexpected relationships between inputs and outputs. If you’ve got a prediction task that could benefit from both of these models (recommendation models or models with text inputs are good examples), wide & deep might be a good fit. In this case, I tried a wide and deep model each separately, then combined them, and found accuracy to be best with wide & deep together. Let’s dive in.
The dataset: predicting the price of wine
We’ll use
this wine dataset from Kaggle to see:
Can we predict the price of a bottle of wine from its description and variety?
This problem is well suited for wide & deep learning because it involves text input and there isn’t an obvious correlation between a wine’s description and its price. We can’t definitively say that wines with the word “fruity” in the description are more expensive, or that wines with “soft tannins” are cheaper. In addition, there are multiple ways to represent text when we feed it into our model, and both can lead to different types of insights. There are both wide representations (bags of words) and deep ones (embeddings), and combining the two can allow us to extract more meaning from text. This dataset has lots of different feature possibilities but we’ll use only the description and variety to keep things relatively simple. Here’s a sample input and prediction from this dataset:
Inputs
- Description: Powerful vanilla scents rise from the glass, but the fruit, even in this difficult vintage, comes out immediately. It’s tart and sharp, with a strong herbal component, and the wine snaps into focus quickly with fruit, acid, tannin, herb and vanilla in equal proportion. Firm and tight, still quite young, this wine needs decanting and/or further bottle age to show its best.
- Variety: Pinot Noir
Prediction
Price — $45
To begin, here are all the imports we’ll need to build this model:
import os
import numpy as np
import pandas as pd
import tensorflow as tf

from sklearn.preprocessing import LabelEncoder

from tensorflow import keras
layers = keras.layers

# This code was tested with TensorFlow v1.7
print("You have TensorFlow version", tf.__version__)
Since the output (prediction) of our model is a number for price, we’ll feed the price value directly to our model for training and evaluation. The full code for this model is available on
GitHub. Here I’ll highlight the key points.
First, let’s download the data and convert it to a Pandas data frame:
!wget -q https://storage.googleapis.com/sara-cloud-ml/wine_data.csv
data = pd.read_csv("wine_data.csv")
Next we’ll split it into a training and testing set and extract the features and labels:
train_size = int(len(data) * .8)

# Train features
description_train = data['description'][:train_size]
variety_train = data['variety'][:train_size]

# Train labels
labels_train = data['price'][:train_size]

# Test features
description_test = data['description'][train_size:]
variety_test = data['variety'][train_size:]

# Test labels
labels_test = data['price'][train_size:]
Part 1: the wide model
Feature 1: Wine description
To create a wide representation of our text descriptions we’ll use a bag of words model. More on that
here, but for a quick recap: a bag of words models looks for the presence of words in each input to our model. You can think of each input as a bag of Scrabble tiles, where each tile contains a word instead of a letter. The model doesn’t take into account the order of words in a description, just the presence or absence of a word.
 |
| Think of the inputs for a bag of words model as Scrabble tiles, where each tile contains a word (instead of a letter) from our input. |
Instead of looking at every word found in every description in our dataset, we’ll limit our bag of words to the top 12,000 words in our dataset (don’t worry, there’s a built-in Keras utility for creating this vocabulary). This is considered “wide” because the input to our model for each description will be a 12k element wide vector with 1s and 0s indicating the presence of words from our vocabulary in a particular description.
Keras has some handy utilities for text preprocessing that we’ll use to convert the text descriptions into a bag of words. With a bag of words model we’ll typically want to only include a subset of the total words found in our dataset in the vocabulary. In this example I used 12,000 words, but this is a hyperparameter you can tune (try a few values and see what works best on your dataset). We can use the Keras
Tokenizer class to create our bag of words vocabulary:
vocab_size = 12000
tokenize = keras.preprocessing.text.Tokenizer(num_words=vocab_size, char_level=False)
tokenize.fit_on_texts(description_train) # only fit on train
Then we’ll use the
texts_to_matrix function to convert each description to a bag of words vector:
description_bow_train = tokenize.texts_to_matrix(description_train)
description_bow_test = tokenize.texts_to_matrix(description_test)
Feature 2: Wine variety
In the original Kaggle dataset there are 632 total varietals of wine. To make it easier for our models to extract patterns, I did a bit of preprocessing to keep only the top 40 varietals (around 65% of the original dataset, or 96k total examples). We’ll use a Keras utility to convert each of these varieties to integer representation, and then we’ll create 40-element wide one-hot vectors for each input to indicate the variety:
# Use sklearn utility to convert label strings to numbered index
encoder = LabelEncoder()
encoder.fit(variety_train)
variety_train = encoder.transform(variety_train)
variety_test = encoder.transform(variety_test)
num_classes = np.max(variety_train) + 1

# Convert labels to one hot
variety_train = keras.utils.to_categorical(variety_train, num_classes)
variety_test = keras.utils.to_categorical(variety_test, num_classes)
Now we’re ready to build the wide model.
Building the wide model with the Keras functional API
Keras has two APIs for building models: the Sequential API and the Functional API. The Functional API gives us a bit more flexibility in how we define our layers, and lets us combine multiple feature inputs into one layer. It also makes it easy to combine our wide and deep models into one when we’re ready. With the Functional API, we can define our wide model in just a few lines of code. First, we’ll define our input layer as a 12k element vector (for each word in our vocabulary). We’ll then connect this to our Dense output layer to generate price predictions:
bow_inputs = layers.Input(shape=(vocab_size,))
variety_inputs = layers.Input(shape=(num_classes,))
merged_layer = layers.concatenate([bow_inputs, variety_inputs])
merged_layer = layers.Dense(256, activation='relu')(merged_layer)
predictions = layers.Dense(1)(merged_layer)
wide_model = Model(inputs=[bow_inputs, variety_inputs], outputs=predictions)
Then we’ll compile the model so it’s ready to use:
wide_model.compile(loss='mse', optimizer='adam', metrics=['accuracy'])
If we were using the wide model on its own, this is where we’d run training with
fit() and evaluation with
evaluate(). Since we’re going to combine it with our deep model later on we can hold off on training until the two models are combined. Time to build our deep model!
Part 2: the deep model
To create a deep representation of the wine’s description we’ll represent it as an
embedding. There are lots of resources on
word embeddings, but the short version is that they provide a way to map word to vectors so that similar words are closer together in vector space.
Representing descriptions as a word embedding
To convert our text descriptions to an embedding layer, we’ll first need to convert each description to a vector of integers corresponding to each word in our vocabulary. We can do that with the handy Keras
texts_to_sequences method:
train_embed = tokenize.texts_to_sequences(description_train)
test_embed = tokenize.texts_to_sequences(description_test)
Now that we’ve got integerized description vectors, we need to make sure they’re all the same length to feed them into our model. Keras has a handy method for that too. We’ll use
pad_sequences to add zeros to each description vector so that they’re all the same length (I used 170 as the max length so that no descriptions were cut short):
max_seq_length = 170
train_embed = keras.preprocessing.sequence.pad_sequences(train_embed, maxlen=max_seq_length)
test_embed = keras.preprocessing.sequence.pad_sequences(test_embed, maxlen=max_seq_length)
With our descriptions converted to vectors that are all the same length, we’re ready to create our embedding layer and feed it into a deep model.
Building the deep model
There are two ways to create an embedding layer — we can use weights from pre-trained embeddings (there are many open source word embeddings) or we can learn the embeddings from our vocabulary. It’s best to experiment with both and see which one performs better on your dataset. Here we’ll use learned embeddings.
First, we’ll define the shape of our inputs to the deep model. Then we’ll feed it into the Embedding layer. Here I’m using an Embedding layer with 8 dimensions (you can experiment with tweaking the dimensionality of your embedding layer). The output of the Embedding layer will be a three dimensional vector with shape: [batch size, sequence length (170 in this example), embedding dimension (8 in this example)]. In order to connect our Embedding layer to the Dense, fully connected output layer we need to flatten it first:
deep_inputs = layers.Input(shape=(max_seq_length,))
embedding = layers.Embedding(vocab_size, 8,   input_length=max_seq_length)(deep_inputs)
embedding = layers.Flatten()(embedding)
Once the embedding layer is flattened it’s ready to feed into the model and compile it:
embed_out = layers.Dense(1, activation='linear')(embedding)
deep_model = Model(inputs=deep_inputs, outputs=embed_out)
deep_model.compile(loss='mse', optimizer='adam', metrics=['accuracy'])
Part 3: wide and deep
Once we’ve defined both of our models, combining them is easy. We simply need to create a layer that concatenates the outputs from each model, then merge them into a fully connected Dense layer, and finally define a combined model that combines the input and output from each one. Obviously since each model is predicting the same thing (price), the output or labels from each one will be the same. Also note that since the output of our model is a numerical value we don’t need to do any preprocessing — it’s already in the right format:
merged_out = layers.concatenate([wide_model.output, deep_model.output])
merged_out = layers.Dense(1)(merged_out)
combined_model = Model(wide_model.input + [deep_model.input], merged_out)
combined_model.compile(loss='mse',optimizer='adam', metrics=['accuracy'])
With that, it’s time to run training and evaluation. You can experiment with the number of training epochs and batch size that works best for your dataset:
# Training
combined_model.fit([description_bow_train, variety_train] + [train_embed], labels_train, epochs=10, batch_size=128)

# Evaluation
combined_model.evaluate([description_bow_test, variety_test] + [test_embed], labels_test, batch_size=128)
Generating predictions on our trained model
Time for the most important part — seeing how our model performs on data it hasn’t seen before. To do this, we can call
predict() on our trained model, passing it our test dataset (in a future post I’ll cover how to get predictions from plain text input):
predictions = combined_model.predict([description_bow_test, variety_test] + [test_embed])
Then we’ll compare predictions to the actual values for the first 15 wines from our test dataset:
for i in range(15):
    val = predictions[i]
    print(description_test[i])
    print(val[0], 'Actual: ', labels_test.iloc[i], '\n')
How did the model do? Let’s take a look at the three examples from our test set:
Powerful vanilla scents rise from the glass, but the fruit, even in this difficult vintage, comes out immediately. It's tart and sharp, with a strong herbal component, and the wine snaps into focus quickly with fruit, acid, tannin, herb and vanilla in equal proportion. Firm and tight, still quite young, this wine needs decanting and/or further bottle age to show its best.
Predicted:  46.233624 Actual:  45.0

A good everyday wine. It's dry, full-bodied and has enough berry-cherry flavors to get by, wrapped into a smooth texture.
Predicted:  9.694958 Actual:  10.0
Here's a modern, round and velvety Barolo (from Monforte d'Alba) that will appeal to those who love a thick and juicy style of wine. The aromas include lavender, allspice, cinnamon, white chocolate and vanilla. Tart berry flavors backed by crisp acidity and firm tannins give the mouthfeel determination and grit.
Predicted:  41.028854 Actual:  49.0
Pretty well! It turns out there is some relationship between a wine’s description and its price. We may not be able to see it instinctively, but our ML model can.
What’s next?
We covered a lot of material here but there are always more layers 😉. In a future post, I’ll cover how to train this model in the cloud. Also, a trained model isn’t the end of the road. If you’re training a model chances are you probably want to build an app that makes predictions on it. In another post I’ll cover serving this model in production and building an app to make predictions against it: enter a wine description, predict the price.
Want to build your own wide + deep model in Keras? Check out the full code from this model
on GitHub and dive into the
Keras Functional API docs. Let me know if you have any feedback in the comments or on Twitter
@SRobTweets. Cheers! 🥂


