Building a text classification model with TensorFlow Hub and Estimators
August 15, 2018
Posted by Sara Robinson, Developer Advocate

We often see transfer learning applied to computer vision models, but what about using it for text classification? Enter TensorFlow Hub, a library for enhancing your TF models with transfer learning. Transfer learning is the process of taking the weights and variables of a pre-existing model that has already been trained on lots of data and leveraging it for your own data and prediction task.

One of the many benefits of transfer learning is that you don’t need to provide as much of your own training data as you would if you were starting from scratch. But where do these pre-existing models come from? That’s where TensorFlow Hub comes in handy: it provides a whole repository of existing model checkpoints for various types of models — images, text, and more. In this post, I’ll walk you through building a model to predict the genre of a movie from its description using a TensorFlow Hub text module.

You can run this model in the browser with zero setup using Colab.

Import and preprocessing data

For this model we’ll use this awesome public domain movie dataset from Kaggle. It has data on over 45,000 movies. There’s lots of data on each movie, but to keep things simple we’ll use only the movies description (called “overview”) in this dataset, and its genres. Here’s a preview of the dataset in Kaggle:
movie dataset from Kaggle
First, we’ll import the libraries we’ll be using to build this model:
import numpy as np
import pandas as pd

import tensorflow as tf
import tensorflow_hub as hub

from sklearn.preprocessing import MultiLabelBinarizer
I’ve made the CSV file from this dataset available in a public Cloud Storage bucket. We can run the following command to download the data to our Colab instance and read it as a Pandas dataframe:
!wget 'https://storage.googleapis.com/movies_data/movies_metadata.csv'
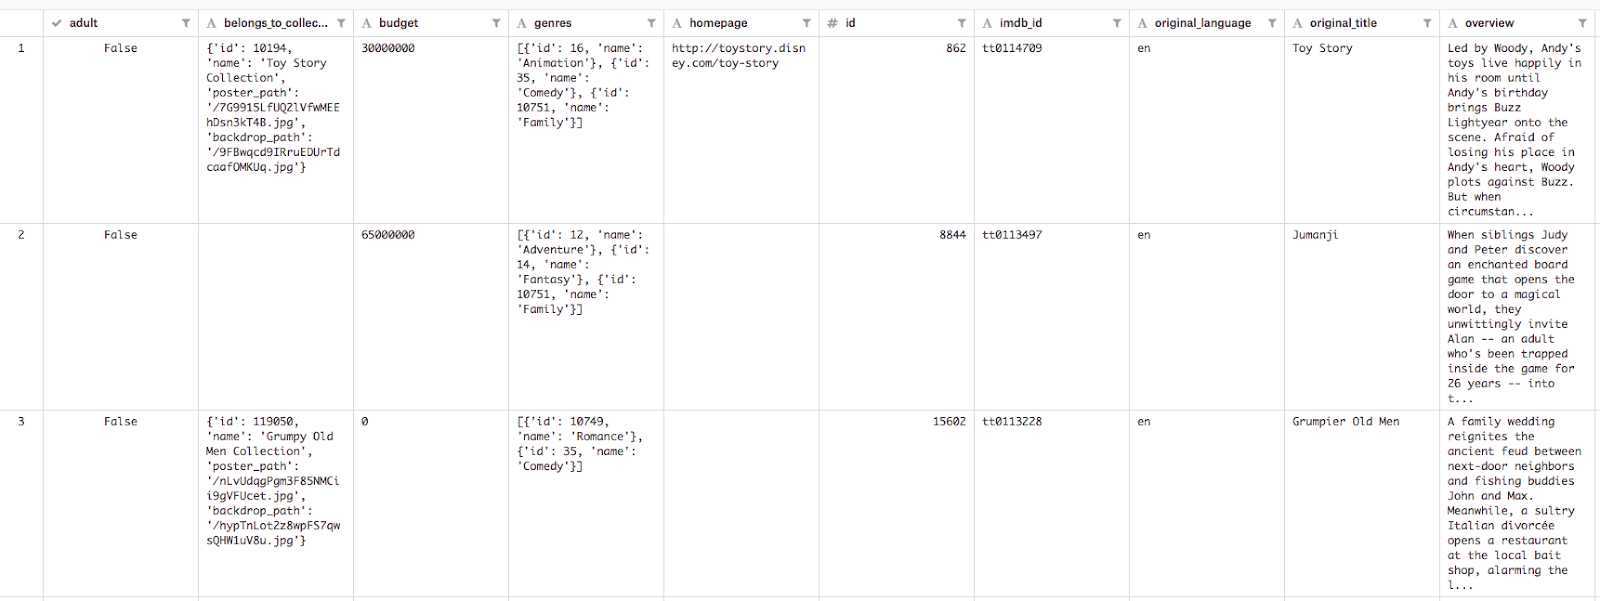
data = pd.read_csv('movies_metadata.csv')

descriptions = data['overview']
genres = data['genres']
To keep things simple, we’ll limit the possible genres to the following:
top_genres = ['Comedy', 'Thriller', 'Romance', 'Action', 'Horror', 'Crime', 'Documentary', 'Adventure', 'Science Fiction']
We’ll limit our dataset to movies with non-empty descriptions in those genres and then we can split our data into training and testing sets using an 80% / 20% train / test split:
train_size = int(len(descriptions) * .8)

train_descriptions = descriptions[:train_size]
train_genres = genres[:train_size]

test_descriptions = descriptions[train_size:]
test_genres = genres[train_size:]

Building our embedding layer with TF Hub

Creating an embedding with TF Hub uses a surprisingly small amount of code. Our model will only have one feature (the description) and it’ll be represented as an embedding column. Text embeddings provide a way to represent pieces of text in vector space, so that similar words or sentences are closer together in the embedding space (you can read more about them here). You can build text embedding vectors from scratch using entirely your own data. TF Hub simplifies this process by providing text embeddings that have already been trained on a variety of text data.

For English text, TF Hub provides a variety of embeddings trained on different kinds of text data:
  • Universal sentence encoder: for longer form text inputs
  • ELMo: deep embeddings trained on the 1B Word Benchmark
  • Neural Network Language Model embeddings: trained on Google News
  • Word2vec: trained on Wikipedia
The pre-trained text embeddings you choose is a hyperparameter in your model, so it’s best to experiment with different ones and see which one yields the highest accuracy. Start with the model that was trained on text closest to yours. Since our movie descriptions are longer inputs, I found I got the highest accuracy with the universal sentence encoder embeddings. This will encode our descriptions into high dimensional text vectors. Note that this particular model is quite large and will take up 1 GB.

We can use hub.text_embedding_column to create a feature column for this layer in one line of code, passing it the name of our layer (“movie_descriptions”) and the URL of the TF Hub model we’ll be using:
description_embeddings = hub.text_embedding_column(
  "movie_descriptions", 
  module_spec="https://tfhub.dev/google/universal-sentence-encoder/2"
)
Note that it may take some time to run this cell since it’s downloading the pre-trained embeddings.

The best part about this is that we don’t need to do any preprocessing to feed our text descriptions into the pre-trained word embeddings. If we were building this model from scratch we’d need to convert our descriptions into vectors ourselves, but with the TF Hub column we can pass our description strings directly to the model.

Turning labels into multi-hot encodings

Since a movie often has multiple genres, our model will return multiple possible labels for each movie. Our genres are currently a list of strings for each movie (like ['Action', 'Adventure']). Since each label needs to be the same length, we’ll transform these lists into multi-hot vectors of 1s and 0s corresponding to the genres present in a particular description. The multi-hot vector for an Action and Adventure movie would look like the following:
# Genre lookup, each genre corresponds to an index
top_genres = ['Comedy', 'Thriller', 'Romance', 'Action', 'Horror', 'Crime', 'Documentary', 'Adventure', 'Science Fiction']

# Multi-hot label for an action and adventure movie
[0 0 0 1 0 0 0 1 0]
To transform our string labels into multi-hot vectors in just a few lines of code we’ll use a scikit learn utility called MultiLabelBinarizer:
encoder = MultiLabelBinarizer()
encoder.fit_transform(train_genres)
train_encoded = encoder.transform(train_genres)
test_encoded = encoder.transform(test_genres)
num_classes = len(encoder.classes_)
You can print encoder.classes_ to see a list of all the string classes your model is predicting.

Building and training a DNNEstimator model

For our model we’ll use a DNNEstimator to build a deep neural net that returns a multi-hot vector, since each movie can have 0 or more possible labels (this is different from a model where each input has exactly one label). The first parameter we pass to our DNNEstimator is called a head, and defines the type of labels our model should expect. Since we want our model to output multiple labels, we’ll use multi_label_head here:
multi_label_head = tf.contrib.estimator.multi_label_head(
    num_classes,
    loss_reduction=tf.losses.Reduction.SUM_OVER_BATCH_SIZE
)
We can now pass this in when we instantiate our DNNEstimator. The hidden_units param indicates how many layers we’ll have in our network. This model has 2 layers, the first has 64 neurons and the second has 10. Number of layers and layer size is a hyperparameter so you should try out different values to see what works best for your dataset. Finally, we pass our feature columns to the Estimator. In this case we only have one (the description), and we’ve already defined it as a TF Hub embedding column above so we can pass that here as a list:
estimator = tf.contrib.estimator.DNNEstimator(
    head=multi_label_head,
    hidden_units=[64,10],
    feature_columns=[description_embeddings]
)
We’re almost ready to train the model. Before we can train our estimator instance, we need to define our training input function. An input function connects our data to the model. Here we’ll use a numpy_input_fn and feed our data to our model as numpy arrays:
# Format our data for the numpy_input_fn
features = {
  "descriptions": np.array(train_descriptions)
}
labels = np.array(train_encoded)

train_input_fn = tf.estimator.inputs.numpy_input_fn(
    features, 
    labels, 
    shuffle=True, 
    batch_size=32, 
    num_epochs=20
)
The batch_size and num_epochs parameters in our input function are both hyperparameters. batch_size tells our model how many examples will be passed to our model during one iteration, and num_epochs is the number of times our model will go through the entire training set.

Time to train our model. We can do this with one line of code:
estimator.train(input_fn=train_input_fn)
To evaluate the accuracy of our model, we create an eval input_function with our test data, and call estimator.evaluate():
eval_input_fn = tf.estimator.inputs.numpy_input_fn({"descriptions": np.array(test_descriptions).astype(np.str)}, test_encoded.astype(np.int32), shuffle=False)

estimator.evaluate(input_fn=eval_input_fn)
This model achieved 91.5% AUC, and 74% precision / recall. Your results may vary slightly.

Generating predictions on our trained model

Time for the best part: generating predictions on data our model hasn’t seen before. First, let’s set up an array of a few descriptions (I grabbed these from IMDB):
raw_test = [
    "An examination of our dietary choices and the food we put in our bodies. Based on Jonathan Safran Foer's memoir.", # Documentary
    "A teenager tries to survive the last week of her disastrous eighth-grade year before leaving to start high school.", # Comedy
    "Ethan Hunt and his IMF team, along with some familiar allies, race against time after a mission gone wrong." # Action, Adventure
]
We’ll then define our prediction input function and call predict():
predict_input_fn = tf.estimator.inputs.numpy_input_fn({"descriptions": np.array(raw_test).astype(np.str)}, shuffle=False)

results = estimator.predict(predict_input_fn)
Finally, we can iterate through the results and display the top 2 genres found for each movie along with their confidence values:
for movie_genres in results:
  top_2 = movie_genres['probabilities'].argsort()[-2:][::-1]
  for genre in top_2:
    text_genre = encoder.classes_[genre]
    print(text_genre + ': ' + str(round(movie_genres['probabilities'][genre] * 100, 2)) + '%')
Our model is able to tag all of the movie descriptions above correctly.

Get Started

Want to start building your own model with TF Hub? Check out the documentation and tutorials. You can find the full code for the model outlined here on GitHub or Colab. In a future post, I’ll cover how to export this model for serving on TensorFlow Serving, or Cloud ML Engine — and build an app that generates predictions on new descriptions.

If you have questions or feedback, let me know on Twitter @SRobTweets.
Next post
Building a text classification model with TensorFlow Hub and Estimators

Posted by Sara Robinson, Developer Advocate

We often see transfer learning applied to computer vision models, but what about using it for text classification? Enter TensorFlow Hub, a library for enhancing your TF models with transfer learning. Transfer learning is the process of taking the weights and variables of a pre-existing model that has already been trained on lots of data and leveraging i…