Posted by Miles Hutson and Aaron Loh, Google Health
At Google I/O in May, we previewed our DermAssist web application designed to help people understand issues related to their skin. The tool is designed to be easy to use. Upon opening it, users are expected to take three images of their skin, hair, or nail concern from multiple angles, and provide some additional information about themselves and their condition.
 |
| This product has been CE marked as a Class I medical device in the EU. It is not available in the United States. |
We recognize that when users take pictures on their phone, some images could be blurry or have poor lighting. To address this, we initially added a “quality check” after images had been uploaded, which would prompt people to retake an image when necessary. However, these prompts could be a frustrating experience for them, depending on their upload speed, how long they took to acquire the image, and the multiple retakes it might require to pass the quality check.
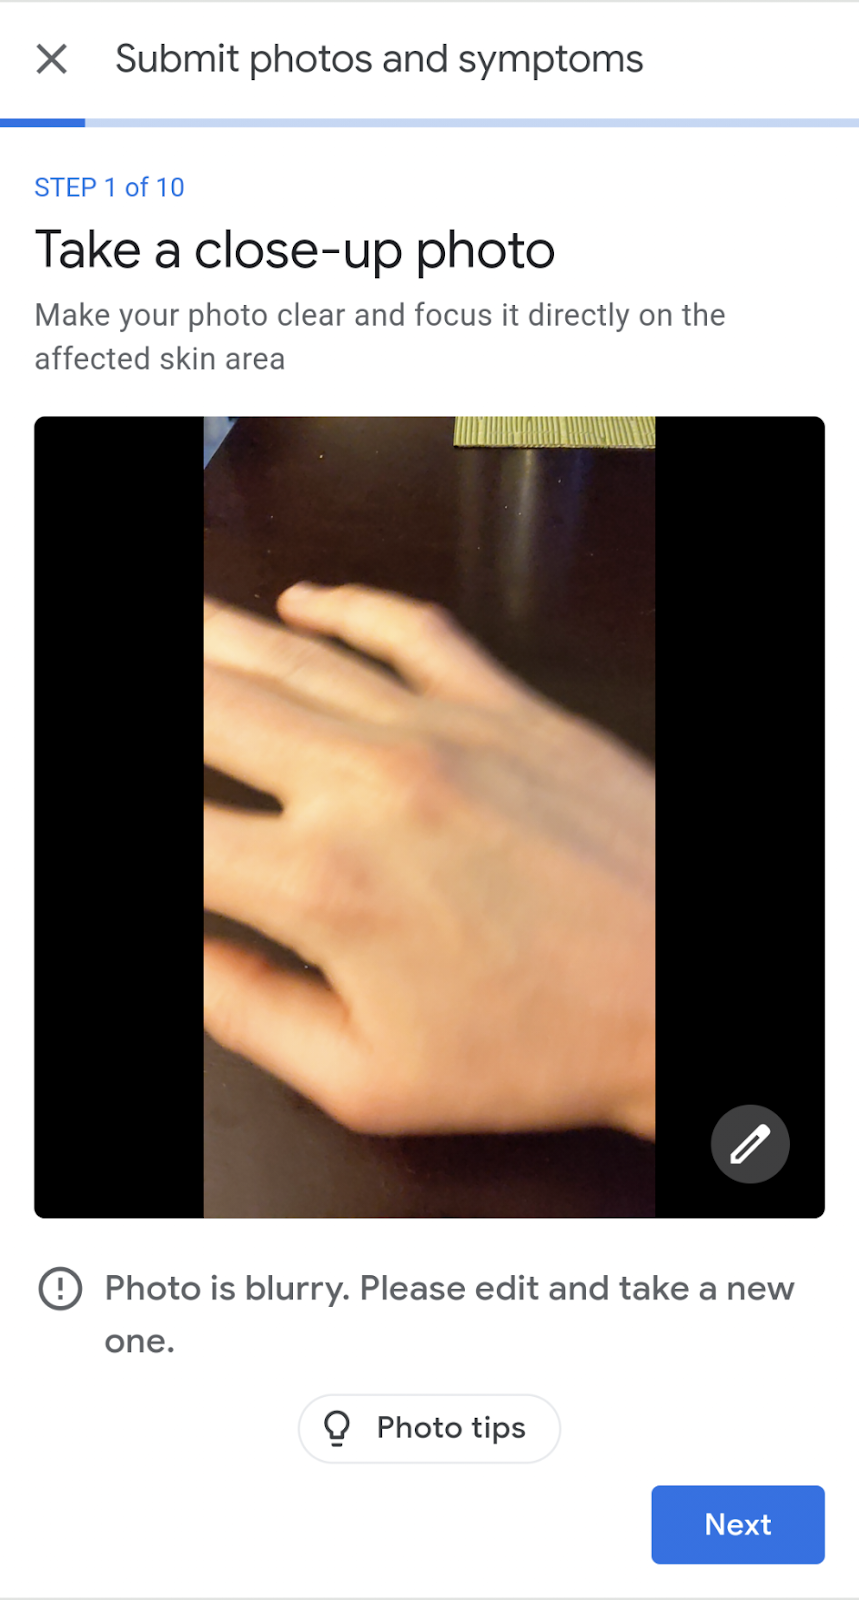 |
| Letting the user know they uploaded an image with insufficient quality and advising them to retake it before they proceed. |
To improve their experience, we decided to give users image quality feedback both on-device as they line up a photo, and when they review the photo before uploading. The way this feature works can be seen below. As the user lines up their camera for a shot, they may get a notification that their environment has a lighting issue (right image). Or, they may be notified that they took a blurry photo as they moved their camera (left image); the model helpfully lets them know their image is blurred before they go to the trouble of uploading it. They can decide to go back and correct the issue without the need to upload the image.
 |
 |
Examples of poor lighting or blurry images that obtain real time feedback so the user knows to take a new photo
When developing the model, it was important to ensure that the model could comfortably run on-device. One such architecture designed for that purpose is MobileNetV2, which we selected as the backbone for the model.
Our discussions with dermatologists highlighted recurrent issues with image quality, such as the image being too blurry, too badly lit, or inappropriate for interpreting skin diseases. We curated several datasets to tackle those issues, which also informed the outputs of the model. The datasets included a crowdsourced data collection, public datasets, data obtained from tele-dermatology services, and synthetically generated images, many of which were further labeled by trained human graders. Combined, we trained the model on more than 30k images.
We trained the model with multiple binary heads, one for each quality issue. In the diagram below, we see how the input image is fed into a MobileNet feature extractor. This feature embedding is then fed to multiple distinct fully connected layers, producing a binary output (yes/no), each corresponding to a certain quality issue.

The infrastructure we used to train the model was built using TensorFlow, and exported models in the standard SavedModel format.
Our team’s infrastructure for training models makes use of TensorFlow examples, which meant that the exported SavedModel had nodes for loading and preprocessing TensorFlow Examples.
TensorFlow.js at present does not support such preprocessing nodes. Therefore, we modified the signature of the SavedModel to use the image input node after the preprocessing nodes as input to the model. We re-implemented the processing in our Angular integration below.
Having rebuilt the SavedModel in the correct format for conversion, we employed the TensorFlow.js converter to convert it to the TensorFlow.js model format, which consists of a JSON file identifying the model topology, as well as the weights in sharded bin files.
tensorflowjs_converter --input_format=keras /path/to/tfjs/signature/ /path/to/write/tfjs_modelWith the model trained, serialized, and made available for TensorFlow.js, it might feel like the job is pretty much done. However, we still had to integrate the TensorFlow.js model into our Angular 2 web application. While doing that, we had the goal that the model would ultimately be exposed as an API similar to other components. A good abstraction would allow frontend engineers to work with the TensorFlow.js model as they would work with any other part of the application, rather than as a unique component.
To begin, we created a wrapper class around the model ImageQualityPredictor. This Typescript class exposed only two methods:
createImageQualityPredictor that, given a URL for the model, returns a promise for an ImageQualityPredictor.
makePrediction method that takes ImageData and returns an array of quality predictions above a given threshold.
We found that the implementation of makePrediction was key for abstracting the inner workings of our model. The result of calling execute on our model was an array of Tensors representing yes/no probabilities for each binary head. But we didn’t want the downstream application code to be responsible for the delicate task of thresholding these tensors and connecting them back to the heads’ descriptions. Instead, we moved these details inside of our wrapper class. The final return value to the caller was instead an interface ImageQualityPrediction.
export interface ImageQualityPrediction {
  score: number;
  qualityIssue: QualityIssue;
}
In order to make sure that a single ImageQualityPredictor was shared across the application, we in turn wrapped ImageQualityPredictor in a singleton ImageQualityModelService. This service handled the initialization of the predictor and tracked if the predictor already had a request in progress. It also contained helper methods for extracting frames from the ImageCapture API that our camera feature is built on and translating QualityIssue to plain English strings.
Finally, we combined the CameraService and our ImageQualityModelService in an ImageQualityService. The final product exposed for use in any given front end component is a simple observable that provides text describing any quality issues.
@Injectable()
export class ImageQualityService {
  readonly realTimeImageQualityText$: Observable;

  constructor(
      private readonly cameraService: CameraService,
      private readonly imageQualityModelService: ImageQualityModelService) {
    const retrieveText = () =>
        this.imageQualityModelService.runModel(this.cameraService.grabFrame());
    this.realTimeImageQualityText$ =
        interval(REFRESH_INTERVAL_MS)
            .pipe(
                filter(() => !imageQualityModelService.requestInProgress),
                mergeMap(retrieveText),
            );
  }
  // ...
}
This lends itself well to Angular’s normal templating system, accomplishing our goal of making a TensorFlow.js model in Angular as easy to work with as any other component for front end engineers. For example, a suggestion chip can be as easy to include in a component as
 <suggestive-chip *ngIf="(imageQualityText$ | async) as text"
>{{text}}</suggestive-chip>With helping users to capture better pictures in mind, we developed an on-device image quality check for the DermAssist app to provide real-time guidance on image intake. Part of making users’ lives easier is making sure that this model works fast enough such that we can show a notification as quickly as possible while they’re taking a picture. For us, this means finding ways to reduce the model size in order to reduce the time it takes to load on a user’s device. Possible techniques to further advance this goal may be model quantization, or attempts at model distillation into smaller architectures.
To learn more about the DermAssist application, check out our blog post from Google I/O.
To learn more about TensorFlow.js, you can visit the main site here, also be sure to check out the tutorials and guide.

жовтня 11, 2021 — Posted by Miles Hutson and Aaron Loh, Google Health At Google I/O in May, we previewed our DermAssist web application designed to help people understand issues related to their skin. The tool is designed to be easy to use. Upon opening it, users are expected to take three images of their skin, hair, or nail concern from multiple angles, and provide some additional information about themselves and…


