https://blogger.googleusercontent.com/img/b/R29vZ2xl/AVvXsEj-kvxeqi1j9wB_gzUKzd3oSN0B4iZIw5GFinork5BzhkKWOnkiyfOuOmLHuHTImXDRchxib7JhQN84gHzQNf1tnQzowwH12Gsg6K1fIBKHcHTBi2ij0mFUnXwk2mB-vB5yrjwOmDlH2rA/s1600/fashion.png
Posted by Margaret Maynard-Reid
This is a tutorial of how to classify the Fashion-MNIST dataset with tf.keras, using a Convolutional Neural Network (CNN) architecture. In just a few lines of code, you can define and train a model that is able to classify the images with over 90% accuracy, even without much optimization.
 Fashion-MNIST
 can be used as drop-in replacement for the original
MNIST dataset (10 categories of handwritten digits). It shares the same image size (28x28) and structure of training (60,000) and testing (10,000) splits. It’s great for writing “hello world” tutorials for deep learning.
Keras is popular and well-regarded high-level deep learning API. It’s built right into to TensorFlow — in addition to being an independent open source project. You can write all your usual great Keras programs as you normally would using this tf.keras, with the main change being just the imports. Using tf.keras enables you to take advantage of functionality like eager execution and tf.data — should you like to down the road. Here, I’ll cover basics.
I will try to go over some of the deep learning terminologies. If you are a beginner to deep learning, I encourage you to compare and contrast my tutorial with
this much older MNSIT tutorial, using the original low-level TensorFlow APIs, to see how much easier things have become.
Run this notebook in Colab
All the code below is in a Jupyter Notebook on my GitHub. You can open the notebook with
zero setup by directly opening
my Jupyter Notebook on Github with Colab which runs on Google’s VM in the Cloud. Choose this option if you just want to quickly open the notebook and follow along with this tutorial. To learn more about Colab, read the official blog
post or read my blog post on Colab
here.
Data
There are ten categories to classify in the fashion_mnist dataset:
Label Description
0 T-shirt/top
1 Trouser
2 Pullover
3 Dress
4 Coat
5 Sandal
6 Shirt
7 Sneaker
8 Bag
9 Ankle boot
Import the fashion_mnist dataset
Let’s import the dataset and prepare it for training, validation and test.
Load the fashion_mnist data with the keras.datasets API with just one line of code. Then another line of code to load the train and test dataset. Each gray scale image is 28x28.
# Note in Colab you can type "pip install" directly in the notebook
!pip install -q -U tensorflow>=1.8.0
import tensorflow as tf
import numpy as np
import matplotlib.pyplot as plt
# Load the fashion-mnist pre-shuffled train data and test data
(x_train, y_train), (x_test, y_test) = tf.keras.datasets.fashion_mnist.load_data()
print("x_train shape:", x_train.shape, "y_train shape:", y_train.shape)
Visualize the data
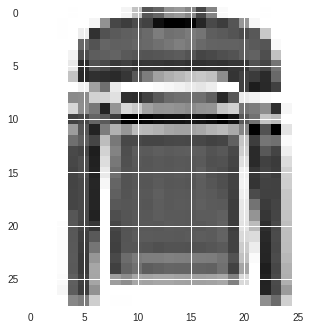
What I like the best about Jupyter Notebook is the visualization. And you can visualize an image from the training data set with matplotlib library’s imshow() to take a look at one of the images from the datasets. Note each image is gray scale in the shape of 28x28.
# Show one of the images from the training dataset
plt.imshow(x_train[img_index])
Data normalization
We then normalize the data dimensions so that they are of approximately the same scale.
x_train = x_train.astype('float32') / 255
x_test = x_test.astype('float32') / 255
Split the data into train/validation/test datasets
In the earlier step of importing the date, we had 60,000 datasets for training and 10,000 test datasets. Now we further split the training data into train/validation. Here is how each type of dateset is used in deep learning:
- Training data — used for training the model
- Validation data — used for tuning the hyperparameters and evaluate the models
- Test data — used to test the model after the model has gone through initial vetting by the validation set.
Model
Let’s define the model and train it.
Create the model architecture
There are two APIs for defining a model in Keras:
- Sequential model API
- Functional API
In this tutorial we are using the
Sequential model API to create a simple CNN model repeating a few layers of a convolution layer followed by a pooling layer then a dropout layer. If you are interested in a tutorial using the Functional API, check out Sara Robinson’s blog
Predicting the price of wine with the Keras Functional API and TensorFlow.
Note you only need to define the input data shape with the first layer. The last layers is a dense layer with softmax activation that classifies the 10 categories of data in fashion_mnist.
model = tf.keras.Sequential()
# Must define the input shape in the first layer of the neural network
model.add(tf.keras.layers.Conv2D(filters=64, kernel_size=2, padding='same', activation='relu', input_shape=(28,28,1)))
model.add(tf.keras.layers.MaxPooling2D(pool_size=2))
model.add(tf.keras.layers.Dropout(0.3))
model.add(tf.keras.layers.Conv2D(filters=32, kernel_size=2, padding='same', activation='relu'))
model.add(tf.keras.layers.MaxPooling2D(pool_size=2))
model.add(tf.keras.layers.Dropout(0.3))
model.add(tf.keras.layers.Flatten())
model.add(tf.keras.layers.Dense(256, activation='relu'))
model.add(tf.keras.layers.Dropout(0.5))
model.add(tf.keras.layers.Dense(10, activation='softmax'))
# Take a look at the model summary
model.summary()
Compile the model
We use model.compile() to configure the learning process before training the model. This is where you define the type of loss function, optimizer and the metrics evaluated by the model during training and testing.
model.compile(loss='categorical_crossentropy',
             optimizer='adam',
             metrics=['accuracy'])
Train the model
We will train the model with a batch_size of 64 and 10 epochs.
model.fit(x_train,
         y_train,
         batch_size=64,
         epochs=10,
         validation_data=(x_valid, y_valid),
         callbacks=[checkpointer])
Test Accuracy
And we get a test accuracy of over 90%.
# Evaluate the model on test set
score = model.evaluate(x_test, y_test, verbose=0)
# Print test accuracy
print('\n', 'Test accuracy:', score[1])
Visualize the predictions
Now we can use the trained model to make predictions / classifications on the test
datasetmodel.predict(x_test) and visualize them. If you see the label as red, it means the prediction is not matching the true label; otherwise it’s green.
 Visualization of 15 predictions


